

Home Freeze-Drying: A Practical Batch Workflow
Mar 17, 2020

To freeze-dry food at home, use a purpose-built food freeze dryer and follow the operating instructions for its exact model. Prepare suitable food, load it evenly, run the correct food cycle, examine samples when the cycle finishes, and pack the dry food promptly. Freezing, drying and packing belong to one continuous job; pressing Start completes only part of it.
The machine removes water, but it does not turn unsafe ingredients into safe food. Start with sound produce or properly handled prepared food, keep raw ingredients away from ready-to-eat items, and preserve the cooking instructions that apply to the food. A crisp texture is useful information about dryness, not a test for harmful microorganisms.
For a first batch, choose one straightforward fruit or vegetable with a clear intended use. Record what went into each tray and leave time to inspect, package and clean at the other end. A modest batch that you can explain and repeat is more valuable than a chamber full of unrelated foods whose different results leave you guessing.

Whole and sliced dry fruit offer different starting points for a small, manageable first batch.
Choose the food and its eventual use
Decide whether you want a dry snack, a topping or an ingredient to rehydrate and cook. That choice changes what a successful result looks like. A strawberry slice for cereal needs recognizable pieces and a pleasant bite. Fruit intended for powder can tolerate more breakage, while a vegetable for soup needs acceptable texture after it meets water again.
Do not treat every food as equally suitable. Concentrated fats, oily spreads and dense sugary foods are poor beginner projects. Start within the food types supported by the machine maker and a relevant extension guide. A special candy setting is not a shortcut for drying a tray of moist produce, even when both products will eventually taste sweet.
Commercial freeze-dried strawberry formats show the difference between whole fruit, slices and smaller pieces. Use that distinction to define your goal, rather than expecting a home batch to reproduce a supplier's declared moisture value or shelf life. Those properties need information beyond the appearance of the fruit.
At XMSD, I would begin a product discussion with the use of the piece, not with the largest piece available. An impressive whole berry can be awkward in a narrow serving scoop. A consistent smaller cut may do a better job in breakfast portions. The same practical choice helps a home operator keep the first trial focused.

Whole fresh carrots still need the preparation appropriate to the chosen preservation method.
Prepare the workspace before preparing the food
Read the manual before installation, not while a full tray waits on the counter. Check the required support, clearance, electrical arrangement, drainage and pump setup against the actual equipment. Machines differ, and an instruction for a different model can put a valve, pump or loading step in the wrong order.
Think through the path the food will take: washing and trimming, prepared-food holding, tray loading, machine access, finished-food packing, then cleanup. Keep the packing surface separate from wet preparation. If the only clear counter will be occupied by washing-up when drying finishes, solve that space problem before starting.
Put the correct trays, clean utensils, food-safe packaging, labels and sealing equipment within reach. Check that the packaging can hold the expected form without forcing large fragile pieces through a small opening. An empty bag that fits on the counter can be much less convenient when you are trying to fill it quickly.
Give the packing task a realistic place in the household routine. Children, pets, food preparation and wet dishes can all compete for the same space. A cleared surface and an agreed person responsible for the finished batch are more practical than assuming someone will notice the completion signal. If another adult may take over, leave the food identity, container choices and relevant instructions together where they will be used, rather than scattered across messages and open browser tabs.
Keep the manufacturer's help details and the model identification together. Write down where its instructions cover an interrupted run, extra drying and cleaning. This small preparation saves you from improvising when a message appears on the screen. It also prevents someone else in the household from restarting the machine without knowing what happened to the food.
Prepare one repeatable load
Wash produce before peeling or cutting, remove unsuitable material, and use the pretreatment recommended for that food. An anti-browning dip for pale fruit addresses appearance; vegetable blanching is a different treatment with a different purpose. Do not substitute a convenient dip for a required preparation step, or copy a time from an unrelated vegetable.
Uniformity means more than making pieces look similar from above. Check the thickest part, particularly with wedges, florets and curved slices. A tray containing thin tips and dense centers is harder to evaluate than one with a more consistent cross-section. Separate noticeably different cuts rather than hoping the equipment will make their behavior identical.
The green apple slice format provides a useful visual reference for a defined cut. It is a frozen ingredient, not a dry snack. When purchased frozen food is your input, retain its handling and cooking directions; ready-to-eat status comes from the food's preparation and instructions, not its frozen appearance.
Spread the prepared food within the model's loading limits and instructions. Avoid an uneven mound in the middle of a tray. Photograph the load from above and note which tray is which. These records are useful when the next batch contains a different variety, a wetter preparation or a cut that only looked similar.

A measured apple cut is easier to reproduce than a handful described only as small pieces.
Keep the food's safety status attached to the batch
Freeze-drying is a water-removal method, not a validated cooking step. University extension guidance emphasizes appropriate food handling because microorganisms can survive the process. A vegetable described as blanched, a raw ingredient and a fully prepared ready-to-eat food therefore need distinct treatment and instructions.
Keep the original package or ingredient record until the batch is labeled. For a prepared dish, record the ingredients, including allergens, as well as whether it was cooked. If a family member will use it later, write usable preparation directions rather than a private abbreviation that only you understand.
A shared workspace needs a deliberate separation between raw preparation and finished dry food. Use cleaned and sanitized food-contact surfaces and utensils, and prevent allergen cross-contact. Trays need attention after every use, including another run of the same food. Remove dry-looking crumbs just as carefully as visible wet food residues.
The familiar sequence in vegetable preparation and freezing helps distinguish washing, cutting, blanching and freezing. Those operations each have a purpose. Adding freeze-drying afterwards should not erase that history or justify changing the eventual cooking requirement.

These broccoli florets are frozen, not freeze-dried; freezing leaves water in the food.
Record useful weights without inventing a dryness target
A kitchen scale helps you understand the batch, provided you separate food from equipment. Record the empty tray weight and the weight of the tray with prepared food. Weigh the finished tray in the same configuration. Different liners or utensils left on a tray can make an apparently precise comparison meaningless.
Worked example: imagine a tray weighing 350 g empty, 950 g with prepared apple pieces and 440 g after drying. The starting food mass is 600 g; the finished food mass is 90 g. The difference is 510 g, and the recovered dry-food mass is 15% of the prepared starting mass. These are invented figures for explaining the arithmetic, not expected apple performance.
That record supports planning, but it does not establish a safe endpoint. Missing fragments, pieces removed for tasting, a changed liner or an inaccurate scale also change the difference. Even an accurate before-and-after weight cannot by itself tell you how much water remains available in a particular thick piece.
Keep the basis of comparison consistent across runs. A weight recorded before peeling cannot be compared directly with one recorded after trimming, and a drained canned fruit differs from fruit weighed with its liquid. Name the stage in the note: prepared food loaded, finished food recovered, and samples removed. This is particularly helpful when budgeting ingredients for repeat breakfast portions, because the amount you buy and the amount you can actually load are two different quantities.
The useful result of the example is a better batch note: both tray weights, the calculated food weights and any losses during handling. If you later rehydrate a portion, the mass difference offers a starting reference, not an instruction to pour the whole calculated amount into every recipe. The finished dish may need a different consistency.
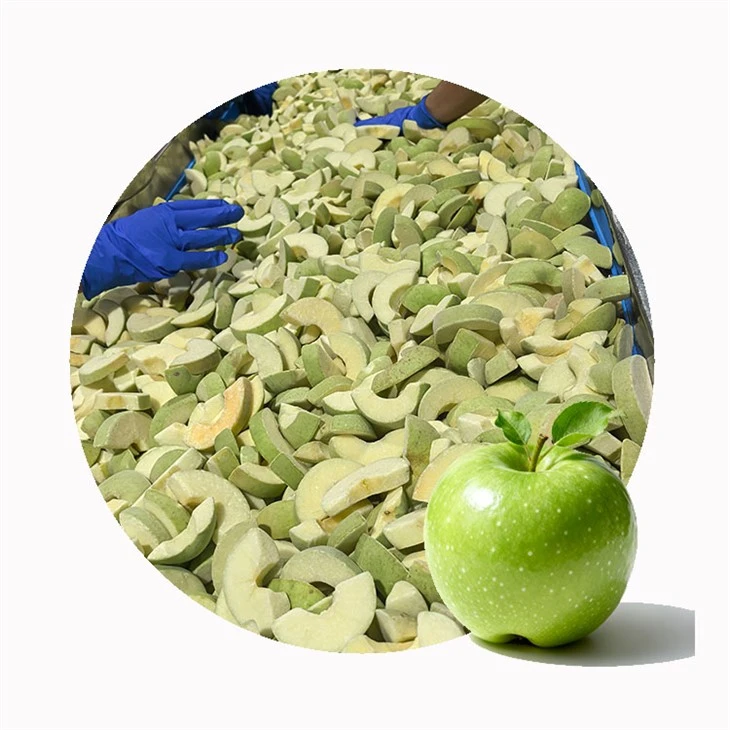
Prepared apple pieces illustrate the importance of a consistent input, not a home-machine setting.
Run the machine's food cycle, not an online timetable
Follow the startup sequence specified for your equipment, including how it handles food that has already been frozen. Check that the selected mode is intended for the food in the chamber. Avoid copying temperature, pressure or duration settings from a video merely because its tray contents look similar.
Food form, loading and equipment all affect the run. The most useful expectation for a beginner is a flexible finishing window with time for checks, not a promise that every fruit batch will be ready at breakfast. Leave enough flexibility to complete an extended run before packaging.
When the equipment reports an error or loses power, retain the message, the approximate timing and what you know about the food's condition. Follow the maker's recovery instructions and assess any perishable food against appropriate food-safety guidance. Restarting the machine is an equipment action; it is not proof that uncertain food handling has been corrected.
Do not improvise a vacuum vessel or alter safety controls to imitate a freeze dryer. An ordinary household freezer also is not a substitute for the controlled drying equipment. If you do not have a suitable machine, choose a preservation method with instructions written for the equipment you actually own.
Inspect different trays before accepting the result
The completion signal is the cue to check the food. University of Minnesota Extension recommends examining samples from each tray because the load can process unevenly. Include larger or thicker pieces rather than selecting only the thinnest, most attractive ones. Break or cut the samples open and inspect their centers.
A damp or unexpectedly cold center, or a texture that remains soft where a dry crisp piece is expected, calls for investigation and the appropriate extra-drying procedure. Follow the food and machine guidance for that procedure. Do not invent an extra hour as a universal correction for every product and load.
Natural fruit color complicates a visual check. Judge the cut center using the relevant food guidance, and never taste suspect food or an ingredient still requiring cooking to decide safety.
I prefer a small, systematic sample over repeatedly squeezing random pieces in the tray. It reduces handling and leaves a record of what was checked. For commercial ingredient work, we would also need agreed quality and safety evidence; a home texture check is not a substitute for a laboratory result or a validated release procedure.

Dry raspberry fragments suit a different finished use from intact fruit.
Plan the handoff from dry tray to closed pack
Prepare the packing area before opening the finished batch. Dry fruit can take up moisture from room air, so leaving it exposed while looking for bags works against the drying effort. Transfer it using clean, dry utensils, keep crumbs out of the seal area, and follow the packaging and sealer instructions.
Practical example: imagine a household wants apple pieces for four separate breakfasts and a second portion reserved for baking. One large jar is convenient to fill, but it must be reopened repeatedly. The household instead assigns smaller breakfast portions and a separate baking portion before starting the run, and prepares the labels and containers in advance.
The decision is about use, not a guaranteed storage duration. The breakfast portions stay closed until needed, while the baking portion can be labeled for later preparation. If a portion is too large for its container, the operator uses another suitable container instead of crushing the fruit to force the original plan.
For the breakfast example, also keep one small portion for a planned tasting at the time it will normally be eaten. Compare the intended bite and ease of serving, while keeping the rest protected. Record whether the portion is satisfying alongside the rest of the meal and whether pieces fit the bowl without being crushed. That application check answers a different question from the drying check: whether the finished format is worth making again.
Packaging has several jobs, illustrated by inner-pack and outer-pack arrangements. For dry food, moisture protection must be suitable for that product; a bag intended for frozen distribution is not automatically appropriate. Oxygen absorbers and desiccants also have different functions and require their own correct use.

Dry fruit needs prompt protection from humidity after it leaves the equipment.
Close the batch with cleaning and a short review
Label the food clearly with its identity, preparation date and any cooking requirement. Retain the batch note with the ingredient information. Choose the storage location and expected use from appropriate guidance for that product and package, rather than copying a decades-long shelf-life claim from a different commercial food.
Then finish the equipment work. Defrost, drain, clean and maintain the machine in the order given by its manufacturer. University of Maine Extension recommends a maintenance log, which is particularly useful for tracking pump work. Keep food packaging away from the wet cleaning area while this takes place.
Unplug equipment before cleaning as directed, and use the cleaning materials and access points specified for the model. Do not remove covers, disturb wiring or improvise a repair because residue is difficult to reach. A machine that looks tidy outside can still need the particular maintenance described in its manual.
Write a brief result while it is fresh in your mind: which pieces were easy to handle, where checks found a problem, whether the intended portion fit its container, and what you would change next time. Change one controllable feature at a time. Otherwise, a better result may be impossible to connect to the alteration that produced it.
When a trial becomes a regular ingredient requirement
A household batch answers whether you enjoy making and using a particular food. A recurring food business needs a different level of repeatability. Count preparation, monitoring, sampling, packing, cleaning and recordkeeping, not only the machine's active drying period. Someone has to own those tasks when the normal operator is away.
For regular ingredient production, I would separate the trial question from the supply question. A successful small apple batch may justify further application testing; it does not establish monthly output, food-business approval or commercial shelf life. Each needs a separate evaluation against the actual production and sales requirements.
If you move toward selling food, check the applicable authority's requirements for the actual product, processing location and sales route before offering it. Home equipment ownership is not permission to sell every item it can dry. Keep that decision separate from the satisfaction of making a good snack for personal use.
The practical standard for a good first batch is straightforward: you know what the food was, how it was prepared, what the machine did, what you checked and how it was packed. You also know how it should be used. That complete record makes the next run easier to improve without pretending that every food follows one universal recipe.
For a recurring fruit ingredient project, send XMSD the intended use, cut and packing needs so we can review the suitable supply format.